Electric bikes have become a significant investment for commuters and enthusiasts alike, with many models costing $1,500 to $5,000 or more. Unlike traditional bicycles, e-bikes attract thieves specifically for their expensive battery packs and motors. An e bike alarm system adds a critical layer of protection, alerting you the moment someone tampers with your ride. This guide covers why alarm systems matter, how they work, and which options work best for DIY installation.
Table of Contents
ToggleKey Takeaways
- E-bike theft has surged 50–70% in the US, with batteries selling for $200–$800 on the secondhand market, making an e bike alarm system essential protection for expensive models.
- An e bike alarm system detects unauthorized movement via motion sensors and produces a loud siren (110–130 decibels) that deters thieves faster than physical locks alone can.
- Combining physical security (U-lock or chain) with an electronic alarm system provides the best defense and is often required by insurance policies for theft coverage.
- Most e bike alarm systems are DIY-friendly, requiring only 10–20 minutes to install and offering 6–12 months of battery life with adjustable sensitivity settings through a smartphone app.
- Premium systems pair motion detection with optional GPS tracking to log your bike’s location if theft occurs, though cellular GPS features may require a $5–$15 monthly subscription.
- Proper installation includes mounting the transmitter on your frame away from the battery pack, cleaning the surface for adhesive grip, and testing sensitivity indoors before street use.
Why E Bike Security Matters More Than Ever
E-bike theft has surged over the past three years. Police departments across the US report a 50–70% increase in electric bike thefts, partly because the battery alone sells for $200–$800 on the secondhand market. Unlike a cable lock, which a determined thief can cut in under two minutes with the right tools, an e bike alarm system creates active deterrence. When motion or vibration triggers the alarm, it produces a loud siren (usually 110–130 decibels) that draws immediate attention. Many thieves abandon the job rather than deal with the noise.
The best defense combines physical security with electronic alerts. A U-lock or chain lock addresses cutting attacks, while an alarm system handles smash-and-grab scenarios. Insurance typically requires both, and many policies won’t cover theft unless you’ve used a certified lock. An e bike alarm system fills the gap, it’s faster than a traditional lock to arm and disarm, and it works even when you’re not within arm’s reach of your bike. You get a phone notification if someone moves or jolts your frame, giving you real-time awareness whether you’re inside a café or across the parking lot.
How E Bike Alarm Systems Work
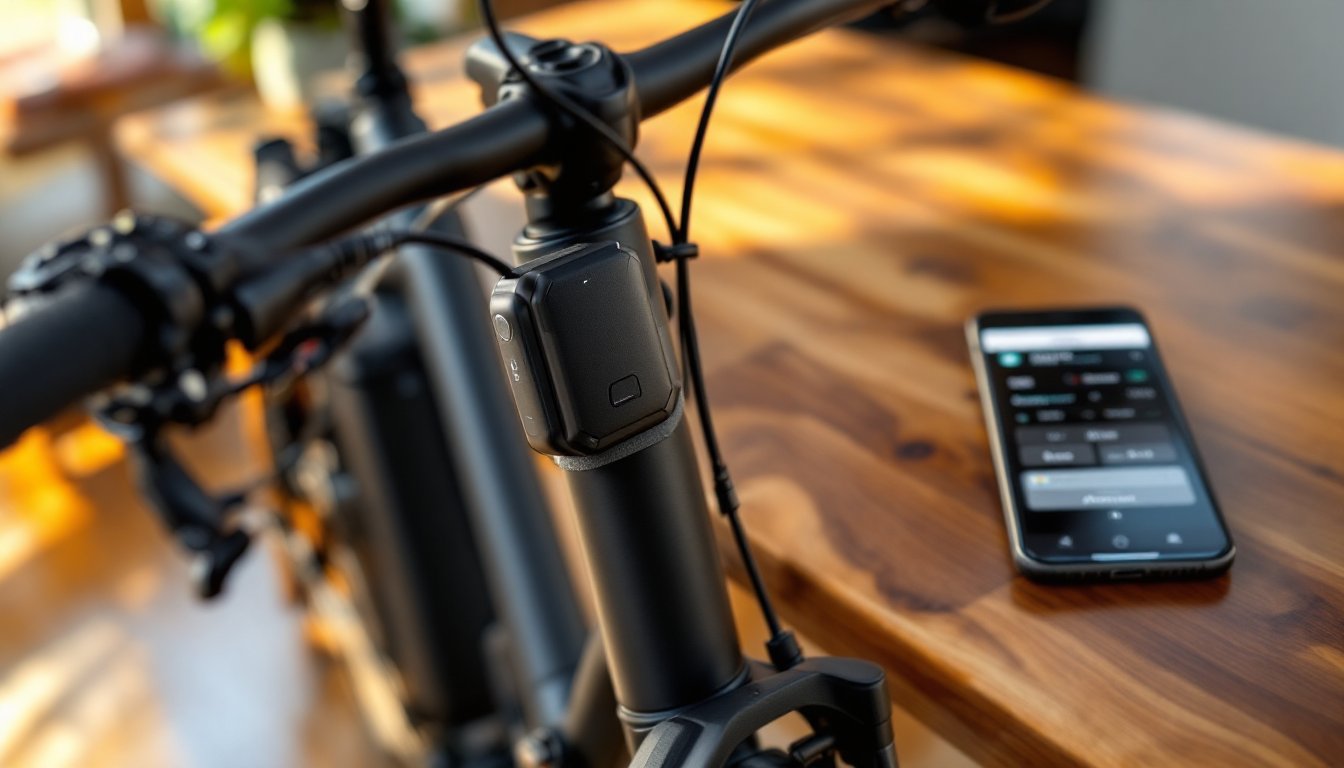
An e bike alarm system relies on a wireless transmitter and receiver to detect unauthorized movement. The transmitter (a small box, usually 3 by 2 inches) mounts directly to your frame using a rubber shim, this prevents false alarms from small vibrations like wind or passing cars. The receiver (your smartphone or a separate fob) communicates via Bluetooth or cellular connection, depending on the system design.
When motion or impact exceeds the sensitivity threshold you set, the transmitter broadcasts a signal to your phone and activates a siren built into the device itself. Most systems let you adjust sensitivity levels in an app: low for outdoor parking (less wind sensitivity), medium for everyday use, and high for parked indoors where no movement should occur.
A quality system will have a 60–90 second disarm window: you can cancel the alarm with your phone or fob before the full siren fires. This prevents false alarms when you’re loading or unloading your e-bike. Backup batteries keep the alarm active even if your primary power drains, look for systems that run 6–12 months between charges on a single AA or AAA cell.
Motion Detection and GPS Tracking Features
Motion detection is the primary trigger for most e-bike alarms. A three-axis accelerometer inside the transmitter registers movement in all directions, up-down, left-right, and forward-backward. This approach is simpler and more power-efficient than GPS alone, and it doesn’t require a cell data plan. GPS tracking, by contrast, relies on cellular or satellite signals and drains the battery faster.
Some premium systems combine both. They use motion detection as the primary alarm trigger and GPS as a secondary feature that logs your bike’s location if theft occurs. You can export the GPS breadcrumb trail to police or an insurance adjuster. Products like those reviewed in best e-bike accessories often pair motion alarms with optional GPS modules. Note that cellular GPS systems may require a monthly subscription ($5–$15), adding ongoing costs to your security setup.
Top Alarm System Types for E Bike Protection
Not all e bike alarm systems work the same way. Here are the main categories and how they differ.
Smart Lock Systems With Built-In Alerts
Smart locks (like electronic U-locks with integrated alarms) combine physical locking and electronic security in one device. You unlock via app, keypad, or physical key, and the lock logs every use. Built-in motion sensors trigger an alarm if someone tries to cut or pry the lock. These systems typically cost $150–$250 and have a battery life of 6–10 months depending on model and usage.
The advantage is simplicity, one device does everything. The downside is that if the battery dies, you’re stuck unless you have a backup mechanical key. Many models include a motion detector alarm system approach where the lock itself contains the sensor, eliminating the need for a separate transmitter mounted elsewhere on the frame. Installation is straightforward: cut the lock shackle into your frame’s U-lock mounting area or use the integrated cable loop. No tools required beyond a set screw driver or Allen wrench to tighten the bracket.
Wireless Sensors and Vibration Monitors
Wireless sensor systems separate the transmitter from your control device, offering more flexibility in placement. A small sensor puck (roughly the size of a car key fob) attaches to your frame: your phone or wearable receives alerts via Bluetooth. These systems excel at detecting vibration and tilt, the transmitter registers when your e-bike is lifted, tilted, or nudged. Pricing ranges from $80–$180, and battery life often stretches 8–12 months.
The trade-off is that Bluetooth range is limited to roughly 100 feet, if you walk two blocks from your parked bike, the connection drops and you lose real-time alerts. Some manufacturers sell online alarm systems with cellular fallback, allowing alerts even beyond Bluetooth range, but these cost $200+. For outdoor urban parking, wireless sensors shine because they’re quick to arm/disarm and don’t require the e-bike to be unlocked when you’re moving it. Just tap your phone and you’re good.
Installation and Setup Tips for DIY Owners
Most e bike alarm systems are DIY-friendly and take 10–20 minutes to install. Here’s what you need to know.
Tools and materials:
- Rubbing alcohol or isopropyl cleaner
- 3M dual-sided mounting tape (included in most kits) or metal L-brackets
- Phillips or Allen wrench (depending on your transmitter model)
- Your smartphone and the system’s mobile app
Installation steps:
-
Choose mounting location. The transmitter should go on the frame between the seat tube and chain stay, this is protected from rain and road debris. Avoid the battery pack or motor housing: vibrations will trigger false alarms. Measure out a spot roughly 2–3 inches from your cable lock mount so the devices don’t interfere.
-
Clean the mounting surface. Wipe down with rubbing alcohol and let dry completely. Dust and oil prevent adhesive tape from gripping. If your frame is powder-coated or has a glossy finish, light scuffing with fine-grit sandpaper helps.
-
Apply the transmitter. Most systems use a rubber vibration isolator shim or foam adhesive backing. Press the transmitter firmly against the frame for 30 seconds. Let the adhesive cure for 24 hours before arming the system (some manufacturers recommend this: check your manual).
-
Mount the receiver or control fob. If your system includes a separate fob or display unit, clip it to your handlebars or secure it with a cable tie. Ensure it’s visible but not prone to snagging on branches.
-
Download and sync the app. Follow the manufacturer’s setup wizard. You’ll pair your phone via Bluetooth, set sensitivity levels, and assign your e-bike a name. Choose a distinct profile, “Front Commuter” or “Weekend Rider”, so you can manage multiple bikes if needed.
-
Test sensitivity indoors. Before using it on the street, arm the system and gently rock your e-bike to ensure the alarm triggers at your chosen level. Then disarm to confirm the phone notification reaches you and the siren stops within your set window (usually 30–90 seconds).
Safety and best practices:
- Never mount the transmitter where water can pool (like the bottom of the frame). Use a weatherproof mount or drill small drainage holes in the rubber shim.
- Check your local noise ordinances before deploying a loud alarm system. Some cities restrict sirens above 110 decibels in residential zones.
- Pair your alarm with a certified lock. According to best electric bikes reviews, security experts recommend using both a U-lock and an alarm rather than relying on one alone.
- Disable the alarm when working on your bike (changing tires, adjusting brakes) to avoid triggering it mid-repair.
- If your e-bike battery is removable, arm the alarm even when the bike is indoors. Thieves often steal batteries alone: an alarm on a stationary frame still provides deterrence.